Wednesday, May 23, 2012

Small Clutch Purse

A couple of years ago, I made a small card wallet with a snap closure. I really enjoyed making them and have given some away as gifts and everyone loved them.

I had forgotten about them. Then I saw something that made me remember, and I wanted to make a bigger one.


I drafted up a quick pattern and whipped up this beauty in 30 minutes!

I wanted to try a rounded flat to give it a different style and I used Velcro this time. I have a long and troubling history with snaps.


The fabric is vintage circa 1970s. It's lined with a simple dusty green fabric and a light interfacing for a little sturdiness.


Now I want to make even more sizes and styles.

Cutting Fabric x3

For all those patterns out there that require you cut out two or three of the same shape.

When I draft up a lot of my own patterns, I use a thick piece of paper so it's sturdy and lasts. It is very hard to pin a heavy piece of paper to fabric so I end up using tailor's chalk. I trace the outline and then from there I cut it out.

Then there are some projects that need multiple pieces of the same pattern cut out. That can get tricky with the outlining method. I find that my pieces rarely match up.

I layer the multiple pieces of fabric on top of one another and cut them all at the same time to get uniform pieces.

This is how I do it:


 Lay out the pieces of fabric on top of each other.


 Smooth out all the wrinkles and lay your pattern piece on top.


 Pin it. As you pin along the outside of the pattern, smooth it out as you go to insure all the pieces underneath are flat.

Then take your chalk and trace your pattern. (I could not for the life of me get a good picture of this step)

Next remove your pattern piece and cut along the chalk line.


 Everything is all cut out and in uniform pieces and it doesn't hurt that you saved a little time too.


I have had success using this method numerous times. It's pretty simple and you only cut once.

Wednesday, May 16, 2012

New stash!

I was over at my sister's house yesterday and she was cleaning out some of her craft supplies and ended up giving me half of her fabric stash. SCORE!


Plus I got an oval wood embroidery hoop and a Simplicity pattern for baby clothes. I think I made out pretty good.


I happily took it, my stash is actually getting kinda low. And who wouldn't want more?

And I got kinda excited that the paisley teal and the orange/ yellow fabric are vintage.

I don't know what I'm going to do with it all! But I'm pretty sure I'll think of something. :)


Wednesday, May 9, 2012

Stubborn Transfer Pencils

I like (most of the time) to use transfer pencils to transfer my embroidery designs onto fabric.
Sometimes they turn out beautifully and sometimes they don't turn out, at all.

I use General's (an art pencil company) transfer pencil. If it's a small design and I don't have to move my iron around a lot on the tracing paper it comes out nice and neat. Other times, only parts are visible and I don't want to leave the iron on it for an extended periods of time (don't want to burn my paper and fabric). A lot of times I can just barely see the design and I then can go over that with the pencil just dark enough to to see it when I embroider it.
I did find that if your marks are dark enough, it will transfer better. But if you move the iron around too much and lift the paper a lot, it will smear your design, and depending on your fabric and if you can wash it out, you ruin that too.


Another way to get pass this is a light box, or a brightly lit window. Just slap the fabric over the design and trace away. You could then use a regular pencil, pressing lightly (I find that that washes off) or a water soluble marker. There are also dressmaker's pencils that wash out too.

Then there are times when you want to embroider on dark fabric, then the transfer pencil becomes useless then.
For these times, I find that the transfer pencil works really well on interfacing. I often iron it on that (use the very thin stuff, tear-away) and it is nice and clear. Or like I stated above, you can fill in the marks that are too light. With this you just tear it away from you finished piece. But be careful to not pull too hard and stretch out your stitches. This will take some time and patience (and can be a little messy).

I couldn't get it to transfer very well so I used the interfacing method.
It's pretty easy to do, just make sure that the fabric underneath is smooth.

It looks like I didn't use interfacing at all.

Tuesday, May 8, 2012

Finishing an Embroidery Hoop

There are a few different way to finish the back of an embroidery hoop.

(I do have another way to finish up a hoop HERE)


Mine was a little different because I didn't have it square on a piece of fabric so I couldn't properly seal it off with a piece of fabric with out gluing it to the hoop itself.

What you will need:

your finished work
a hoop frame
needle and thread
extra fabric
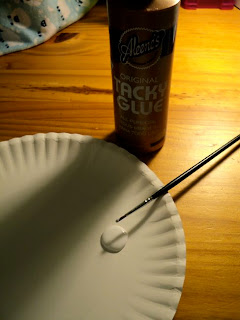
craft clue and brush
scissors

Make sure you measure out your finished piece to figure out what size hoop you need.
Mine fit a size 9' wooden hoop.

Stitches by: me
First position your finished piece in the center of the hoop.


Then take the back part of the hoop and trace it on a separate piece of the fabric, cut down to the size of you hoop. It will be smaller and fit in the circle of the hoop. You can use the same fabric or something different, you won't be able to see the back. Especially if you put it up on a wall.

 Place the hoop over the piece and tighten on to the back hoop.
(make sure your fabric is taunt and wrinkle free)

 Then take a needle with thread and run the thread in and out around the outside of the hoop all the way around.

 Then tighten the thread and tie off so your fabric looks it this.
Now the fabric is gathered in the back and will not peek out.
 Since my piece was not centered on the fabric I had an area that didn't hang over. So I had to finish it a little differently.

This piece is intended to be hang on a wall so the back side will not be seen at all. So I took the other piece of fabric and laid it right side up under the over hang.

 Then I took a small brush and some craft glue and spread the glue out on the fabric and pressed the over hang on to it to secure it in place. 

 Be sure not to use a lot of glue. you don't want it to bleed on the front finished piece.

 After you finish gluing the over hang, the fabric will not be attached to the front piece.
Even though the back side is showing the raw edges, the back of your design will be protected.

 
Let your glue dry completely then it's ready to hang. :)

I have other piece to fit into hoops so I hope to do another tutorial on a different way to finish the back side.
I hope that this was simple and clear to understand. As I do more tutorials, I feel more comfortable in explaining things. Soon, I can just start whipping these things out :)