Monday, April 16, 2012

Bunting: The Tutorial

I made yet another bunting.
 This time for a baby boy. 
This project is simple enough that I felt comfortable with making a tutorial.
Here is what you need:
various pieces of fabric, for the front and back 
(around half a yard each, your stash would work great)
scissors
ruler
pencil
paper
At least 3 yards of extra wide double fold bias tape
thread 
(sewing machine)
needle
pins
dressmakers pencil or chalk
iron 
ironing board


Here we go!

Start out by making a simple pattern from card stock or any think sturdy piece of paper. 
I made my isosceles triangle 8 1/2 x 9 1/2 x 9 1/2 inches. I folded my paper in half so I only had to cut two sides. So when the paper is folded in half only cut half the length on the top (4 1/4 inches instead of 8 1/2 inches)

Then choose fabric to your liking (I used a cottons and some flannels). 
Cut out 8 triangles using your pattern for even pieces.
I found that 8 is a good number for the spacing for the bias tape length.

  
The backing fabric can be whatever you want it to be. I used a solid because it will most likely be hung on a wall. And the backing makes it a little sturdier and lay flatter.

  
Then cut out 8 pieces of the backing.
Then pin together.
Right side together on the inside.

  
Then using a 3/8th seem allowance, sew the two longer sides together. Leave the top open.

  
Then cut the tip of the triangle, and fold the triangle right side out.
(this helps flatten and "sharpen" the tip)

  
Once the right sides are out, use a pencil tip to poke out the tip to a point.
Then it's ironing time!

  
Press!

  
Try to not have the back fabric showing after pressing it flat with the iron. It can be a little trying, but some patience and care, you won't have the back showing.

  
The front of the flags after ironing.

  
The back sides.

Now here's the fun part. (not really, it's just tedious)


 I use the whole 3 yards of double fold bias tape. It's a pretty good length and you don't need to add any extra to it.

Now, line up where you want to put your flags at on the tape. I spaced mine out 5 inches, it gave it a nice spacing between the flags and doesn't look crowded.

Then I pinned them into place in between the fold of the tape, so the rough edge will be sandwiched in and out of site.

Start at the very beginning of the tape and sew all the way to the end to seal the edges and sealing the tape closed.
This is the easiest part.

To hide the raw edges of the tape, sew a bottom to the end so nothing is left hanging out.


Finished!

I hope you enjoyed this tutorial. It's the second one that I have done and it's a little lengthy. But I hope that the instructions where clear and not confusing. If there are any problems or question about this tutorial, please let me know. :)
I would like to make more in the future and share with everyone.


Thursday, April 5, 2012

Coming soon to a blog near you!

I just wanted to pop in and give a heads up on what's been going on.


I've been super busy crafting up thing for my friends that are pregnant. Seems like that they are all pregnant at the same time! Oy!

But with all of the projects that I'm working on (sorry, they are all a surprise, so I have to wait to post) I'm also taking photos so I can have tutorials for them.

I'm super excited to have quite a few tutorials ready to go soon! I'll start to post them after the 21st of April, then it will be safe. :)

Thursday, March 29, 2012

How to properly measure yourself

I've always have had problems in the past with all of the things that I have made from store bought patterns.
That's because I have been measuring myself wrong. After a little research, I found the proper way to to it. I measured myself a few times to make sure that I was doing it right, and each time I came out with the same numbers. And after using my proper measurements I actually made something from a pattern that turned out to fit me correctly.

Here's a quick guide, it's pretty simple.


Bust:  Around the fullest part of the bust. Around your back and up under your armpit. (with your arms down, you should be able to hold up the tape)


Waist: At your natural waist line. (It is higher up then you think)


Hips: The outer most part of your hips.


Inseam: The distance between the inner most part of the thigh to the bottom of your ankle.


Sleeve length: Start at the middle of the back of your neck and measure from your shoulder, then to your elbow and then to your wrist.

If you have difficulty with any of these a partner is a good way to help you get my proper measurements.


Wednesday, March 28, 2012

Ice Cream

I drew up a quick little ice cream cone for my friend's birthday. The more I look at it the more I think that I could have done better, but she liked it, so I guess that the important part. :)

It says: pretty please with a

Tuesday, March 20, 2012

Patience and Work Space

I REALLY want to post all the wonderful things that I have be working on, but unfortunately they are all gifts! grrr... 
But I will have some photo heavy posts in April.

So in the mean time here are some photos of my work area.

It is kinda hard to stay completely focused with a computer right there.
My dad made table. :)

I LOVE the manikin head that I got from my sister.  Her name is Harley. On sunny days you can see her through the window. <3

My back wall. My space is in the loft of our home so it's nice and open. So behind me here is the open hall.

So there is an inside peek of my work space.


Thursday, March 1, 2012

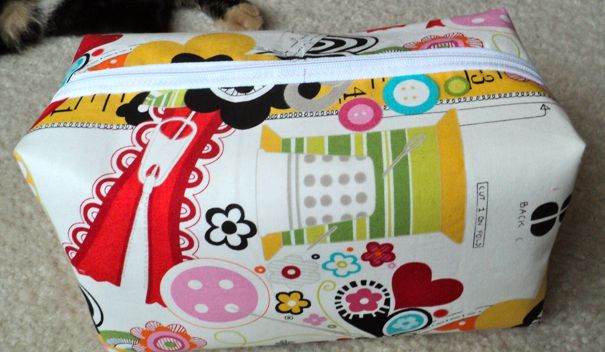
Travel Boxy Bag

A couple of years ago my mom bought me a book on no sew to sew little bags. I put it on my shelf with every intention to make some, but I forgot all about it. :(


I picked it up the other day and decided that it will not be put away until I make one of the bags from it.


The material that the instructions called for was oilcloth, but I don't have that handy and I really wanted to do that style. So, I used two different fabrics and a very stiff interfacing instead.


I thought about putting the handle on but I didn't feel like making one, so this version doesn't have one.


It was pretty easy, the multiple fabric was a little tricky at some points, but overall it was manageable.


It took me a couple of hours tops.


I think now I'll go out to see if I can find some oilcloth and make another one.