Showing posts with label hand stitched. Show all posts

Thursday, March 21, 2013

The Embroidery Tips and Tricks Edition

I've been crafty for a very long time now and I have learn (some the hard way) tips and tricks along the way. I feel the need to spread them around for other people to benefit from.


Here are a few that are very handy and true.

Floss

12 to 14 inches of floss at a time have greatly helped my frustration of the floss twisting up on my in mid use and knotting. 


With the floss twisting up on me, I will hold my project out in front of me and let the floss hang to unwind itself from the weight of the needle. Just make sure the needle wont fall off.

 I find the less floss you have on the needle, the easier it is to pull through the fabric. I use about three strands at a time.

Nice and tidy storage is the key to less stress! To me anyway. Still wrapped in the bands or wound neatly on a bobbin.


Loose tension of the floss makes nice and neat stitches.
When I first started (cross stitch at the time) I pulled way to tight, and all my stitches were uneven. It looked shabby.

The size of your needle plays a big part in the appearance of your handy work.
-Not too large to leave a large visible hole in the fabric, not too small to not be able to even thread it with multiple strands. Play around with the size that you would need for a project.

Also be aware of the type of fabric you are stitching on. Canvas is a very thick material, and can be diffacult to stitch with a larger needle.

Stabilizers

I use couple of different types of interfacing for my stabilizer.

For dark fabric I transfer my design on the interfacing itself and put it on top of the fabric and start to stitch.

I use a tear away interfacing for this method.

If it's a thin or stretchy material, I'll use a thicker, but not so thick to where you can't poke a needle through it and fabric comfortably, underneath.

Colors

If you have a project that requires a lot of colors in small areas, try to have a couple of needles already threaded in the colors you need.

If you want to color tint (color with crayons), do so before you start stitching.

Other 

A nice sharp pair of scissors are your best friend.
Back stitching can be the devil, but a necessary evil, just like french knots. But with practice, they become very easy. 
Well, back stitching is very easy to start with just a pain in the neck.

And speaking of which, Keep your shoulders relaxed. Try not to bunch up. 
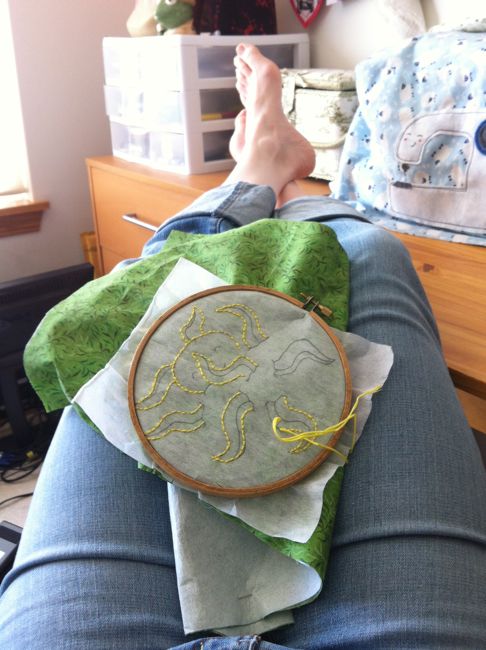
 

 I hope that this tips have come in handy to some. I love learning new and different ways to do things to make it easier to stitch.


Tuesday, January 8, 2013

Christmas gifts of 2012

First I would like to apologize for the lack of posts last month. I had some family issues that took precedents over this blog. But everything is pretty much back to normal now.

Phew! ::wipes sweat from brow::

Now back to your regularly scheduled program.

Handmade goodness!

 I drew this design up awhile ago.

Heart with wings.
 I kinda have a mini tutorial for this one in the queue. :)

 I'm not really all that thrilled with how this one came out. At least it's neat and tidy.

 I did a simplistic outline with this one.
All those french knots!

 These are the whole products. They are clothes hanger covers.
 You may remeber the top design.

 Yet another box bag. (I'm kinda addicted)

A Union Jack trivet (mug rug).

Friday, August 3, 2012

Fishy Cat Toy

I have LOADS of felt pieces just sitting in a drawer waiting to be used.  I just had no clue on what. 
Then the idea to make cat toys popped in my head.

This project was very easy, and very quick.

I drew out some shapes and cut them out.
Then I filled them with a piece of very crinkly plastic. My cat LOVES noise toys.

Then I hand stitched it. Nothing special, Cinnamon doesn't appreciate my fine work.

I used just what ever scraps that I had just hanging out.

All done!
Pretty simple. 

Needless to say, Cinnamon LOVES the fishy toy. She liked to play fetch with it. Every time she's in the other room and I crinkle it, she comes a runnin'!

Thursday, September 22, 2011

Coat Hanger Cover

After years of thinking that coat hangers covers were silly. I saw somewhere a very pretty embroidered cover. And well, lets just say that I'm singing a different tune now.
I have wanted to use this Sublime Stitching design for some time now and thought that it would be prefect for this project!


The coat hanger cover it all it's glory
I've become enslaved in the need to fill in all the empty spaces. 
I actually enjoy satin stitches, they aren't hard and they look pretty. They just take a lot of floss.


Even though you really can't see the hair, I was proud of myself, it was the first time that I really tried a satin stitch.

Thursday, July 14, 2011

Twinkle twinkle little cookie?


I made a star! I completely hand stitched this guy. I hate the way fleece stretches when I try to sew it with the machine. He's a little knobby in the tips but not too bad.


I made yet another cookie! I can't stop! They are so fun and easy to make let alone CUTE!


This time I'm making more to actually put up on my Etsy shop. We are in the process of production and picture taking. We want our shop to be nice and full before we put anything up.

I don't know about the star though. He needs a little more work. I guess I'll just machine sew him, it would look better.

Thursday, October 14, 2010

Latest sewing project...


...was a FAIL!


I did a very well on the sewing it's just that I goofed up on the measurements. :(

It's WAY too big in the ribs.

All the white stitches are hand stitched, so you can guess why I'm very upset that it's the wrong size. It took me a while to make this due to that part alone.


It is completely wearable, just not by me. :(
I haven't decided if I want to give it to someone that will fit into it, or sell it.

But I am proud of how far my sewing skills have come since the first one I made.