Showing posts with label hand embroidery. Show all posts

Sunday, February 10, 2013

Tea Time for Me!

 I thought that it was about time that I stitch myself a kitchen towel. Or tea towel, whatever.
So I grabbed some Stitcher's Revolution designs and when to town. or rather the couch.


 I haven't decided yet if I want to actually use it.


I still have to wash it to remove the transfer marking. But it turned out pretty good.

Tuesday, January 8, 2013

Christmas gifts of 2012

First I would like to apologize for the lack of posts last month. I had some family issues that took precedents over this blog. But everything is pretty much back to normal now.

Phew! ::wipes sweat from brow::

Now back to your regularly scheduled program.

Handmade goodness!

 I drew this design up awhile ago.

Heart with wings.
 I kinda have a mini tutorial for this one in the queue. :)

 I'm not really all that thrilled with how this one came out. At least it's neat and tidy.

 I did a simplistic outline with this one.
All those french knots!

 These are the whole products. They are clothes hanger covers.
 You may remeber the top design.

 Yet another box bag. (I'm kinda addicted)

A Union Jack trivet (mug rug).

Thursday, November 15, 2012

Retro Stitches

Sorry for the radio silence. I've been working on Christmas gifts and started a new job that's taking a lot out of me (but not in a bad way).

I can share one Christmas gift that I was working on. It's for my grandmother. I wanted to use my Colonial Patterns' Stitcher's Revolution Kitchen Stitch'n. Wow, that was kinda a mouth full.


Just a nice simple tea towel to hang in her kitchen.


I know that she will enjoy it.

Friday, September 28, 2012

Night of the Living French Knots!

Not really, but I bet you know what I mean.

I got this design from rectangel from Flickr.

I took a TON of WIP (work in progress) pics about every night that I worked on it, and worked for about two to three hours a night. But I just decided to post the finished piece rather then to clog it up with a dozen photos of something half finished.

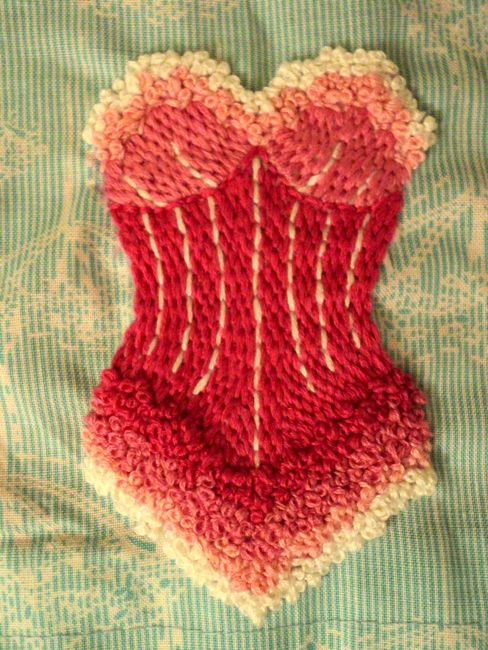
 The complete piece is a clothes hanger cover. 

 That, my friends, is a butt load of french knots. I use to hate these little guys with a passion. Now they are so stinking easy!

 I've noticed that the ombre thing is a thing now, so this is my "jumping on the ban wagon" project.

 Even though I think these stitches are easy now, they still take up a lot of thread. I believe I used almost an entire bobbin of the darkest pink.


Saturday, July 28, 2012

How to finish a Hoop Part: II

 I did a previous post on how to finish a hoop.

This post is an alternative way to finish a hoop. Very similar but different enough.

You will need:
an embroidery hoop or two
needle and thread
your finished piece
a pencil
extra fabric
 
 You can take the same fabric that you used for the project (if you have enough) or you can use a different piece. It really doesn't matter because this is the back side and you probably won't see that side while being displayed.

Fold the fabric in half.
(Make sure that your fabric is right sides facing each other. You will need to flip it right side out to finish.)
Then place the hoop on top of that.
Trace the inside of the hoop.
(I hope you can see the line in the photo)
I really should of ironed this before the pictures, but I was a little pressed for time. I do apologize.
 
You can set this aside and start with the finished piece.


Place you piece on the hoop how you want it to fit and tighten the hoop.
Then:


On the back, start with a running stitch about an inch to 2 inches on the outside of the hooped piece.


Run it along the entire outside of the hoop and end it right next the start, but don't tie it off yet. Take that end piece and gently pull the thread until the fabric gathers (like photos below).


 While keeping the thread taunt, tie off the end and then cut off excess fabric.


This is what it should look like.


Then go back to that piece that you traced and sew around that circle. 
Leave a small open area so you can pull it through.
(Yes this is the same fabric. Unfortunately I ran out of natural light to take photos in)


 Then trim off the excess fabric around the circle.
Next pull the fabric right side out.

Then:


 Placing the fabric circle on top of the back of the piece, stitch it on. A simple running stitch does the trick. It might be a little challenging towards the end, stitch through that top part and still get the bottom fabric too. But you can do it!


Tie off the end and you are finished!
 

 Finished! YAY!


Thursday, July 26, 2012

Summer of the Baby (Baby Maeve post)

This summer I had two friends that gave birth to beautiful babies. One at the end of May (a boy) and the other last week (a girl).

This post is about what I made for Baby Maeve. And what a cutie she is!

And all the cute things for sweet little Simon will be up soon.

The parents didn't want to know the gender of their little bundle of joy. But they wanted the stuff for the baby to be colorful.


I didn't get a picture of the little travel tissue holder. (top of the photo)
 
I tried to think gender neutral but that was kinda difficult. But I got to use nice and bright fabrics and cute onsies.

I made a diaper bag insert.
It holds a couple of diapers and a thing of wipes.


I've posted this unicorn Pegasus before, but now I can say who it was for. I kinda wanted to keep this one, but I guess I can still make another one. :P


 I thought that I would applique a couple of onsies.  Can't go wrong with those.

A cute little Dino. Unfortunately I didn't take a finished photo. :(

And I made a lion. Rawr!


And any friend that is going to have a baby knows by now that they are going to get bunting. It's just something that I make for babies. It helps liven up the walls and something bright and colorful to look at.


Tuesday, July 17, 2012

Family Heirloom Stitching

I spent that day with my mom today. They went to a couple of antique stores and we found a lot of old embroidered tablecloths, napkins, and table runners.
I remember when growing up, my mom had some items like those from her grandmother and used them on occasion.

I think my mom was a little surprised that I was interested in those "old relics".
Later on when we got back to her house, she said that she had some fabric she wanted me to look at to see if I wanted any.

So she gets it all out and siting on top was an old tablecloth that her grandmother appliqued.  She held it up and shook it out, and commented on all the old satins on it and I replied that they give it character, and it was well used.
She was hesitant to put it down and then hands it to me and asks me if I wanted it. She said that she knows that i would appreciate it.
And I do!

 (my foot shown for size)

So this classic is hand embroidered and appliqued. No machine. All her. And the edging is also hand crocheted. It is old and some spots are torn or missing, but that shows it's age. I love every bit of it down to the last stain and tear.


 Check out the hand applique work. Blanket stitch.


 Nice and simple openwork or pulled thread.


I never never met Granny West, but I've heard wonderful stories about my mom and all her sister's spending summers at the farm in Texas.


Wednesday, May 9, 2012

Stubborn Transfer Pencils

I like (most of the time) to use transfer pencils to transfer my embroidery designs onto fabric.
Sometimes they turn out beautifully and sometimes they don't turn out, at all.

I use General's (an art pencil company) transfer pencil. If it's a small design and I don't have to move my iron around a lot on the tracing paper it comes out nice and neat. Other times, only parts are visible and I don't want to leave the iron on it for an extended periods of time (don't want to burn my paper and fabric). A lot of times I can just barely see the design and I then can go over that with the pencil just dark enough to to see it when I embroider it.
I did find that if your marks are dark enough, it will transfer better. But if you move the iron around too much and lift the paper a lot, it will smear your design, and depending on your fabric and if you can wash it out, you ruin that too.


Another way to get pass this is a light box, or a brightly lit window. Just slap the fabric over the design and trace away. You could then use a regular pencil, pressing lightly (I find that that washes off) or a water soluble marker. There are also dressmaker's pencils that wash out too.

Then there are times when you want to embroider on dark fabric, then the transfer pencil becomes useless then.
For these times, I find that the transfer pencil works really well on interfacing. I often iron it on that (use the very thin stuff, tear-away) and it is nice and clear. Or like I stated above, you can fill in the marks that are too light. With this you just tear it away from you finished piece. But be careful to not pull too hard and stretch out your stitches. This will take some time and patience (and can be a little messy).

I couldn't get it to transfer very well so I used the interfacing method.
It's pretty easy to do, just make sure that the fabric underneath is smooth.

It looks like I didn't use interfacing at all.