Wednesday, December 7, 2011

Kitty Coin Purse

 I love making things that I know my nieces will love.
Thgis Christmas I made my other niece a coin purse.
It's a kitty!

I got the pattern from this book: Felt Friends from Japan.
This was a little confusing at first. But I figured out the directions and in no time I whipped it up.

It closes with a simple snap closure.

It has a small pouch inside. Now in my personal opinion, I wouldn't put a lot of coins in it. It is great for paper currency.

Pencil Pouch

 This year for Christmas, I made my oldest niece a cute and fun pencil pouch.

 It's a cute little sausage dog! I got the pattern from Felt Friends from Japan. I love this book! Too many cute projects and felt friends!
The instructions are very easy to follow, loads of pictures and drawings.


I think that I just might have to make one for myself.
  

 It was pretty easy to put together. I can fit about 6 pens in it. And when it's full, he can stand up. hehehe. 
He is too cute!


Monday, November 28, 2011

The disadvantage of Using the Floor as a Work Area

I thought I would share my newest adventure in sew.

I haven't had a cat in quite some time. So I didn't think about laying the pattern piece on the floor to cut them out.

Apparently she LOVES crinkly noises. So this type of paper is her FAVORITE! I had to push her away several times. She left a couple of small holes, but they were in empty spaces.

I think now I have to make her something that has crinkly plastic in it so she will play with that instead. But she would much rather sit on whatever I'm doing instead I bet.

Sunday, November 27, 2011

Ghosts, Monsters and er, Clouds?


These guys are screaming for new homes!
I know I would rather have a Drooly Ghoulie haunt my home then a real ghost.
Today is the last day for the Thanksgiving weekend prices, hurry now!

Monday, November 21, 2011

Gloomy Fall Days

The days have been kinda gloomy and blah lately. But of course when I decided the night before that I was going to post this, it was gloomy.
But today is very sunny and so bright that I had to turn my monitor away just to see it.


I bought some brightly colored felt the other day. I really love how the colors pop with they are together.
Usually when it's cold and dark and just plain blah out, I always break out the bright happy colors. I do that at work a lot. Someone will ask, "Why is there a brightly colored ice cream cone on this cake? It's November." And I'm like, "SO? Wouldn't you eat it?" The other person, "Yeah, you're right, I would."

Wednesday, November 16, 2011

Monday, November 14, 2011

Warning: Mason Jar Pin Cushion Tutorial


And by warning, I mean I've never done a tutorial before. I've always been afraid that I'm not very good at them.
This one is simple enough that I think that I can handle it. Please feel free to ask questions if something doesn't make sense or have other questions.
With this I ask that you wish me luck and maybe if this one is good as it sounds in my head, I'll make more.
I made this cute little mason jar pin cushion in under an hour.

Materials:
thick paper
scissors
fabric
mason jar with a two part lid
hot glue gun
hot glue sticks
ribbons
fiber fill


 1. Trace the flat inner circle of the lid. You can use a dressmakers pencil or marker.
Cut a 1/4 inch away from the inside of the circle (make it smaller) so it doesn't touch the sides of the lid.
(I had to eyeball it because I haven't had a compass since high school)
Then glue that paper to the bottom side of the flat lid. I used paper to help keep the fabric secured to the lid. Hot glue doesn't stay stuck to metal well.

 2.  Mark your fabric with the actual lid size and then a 1 inch larger circle around it. You can use a dressmakers pencil/chalk or marker. Cut your fabric 1 inch larger then the flat lid. Then cut notches all around the circle almost to the original size of the lid (I traced the lid on the fabric too for this). Don't cut the notches too close to the actual size of the lid, you will have fiber fill to bulk up the fabric.
The notches are for easy folding.

 3. Take a nice big fluffy hand full of fiber fill. Make sure you have a full tight ball that feels almost too big for your hand. You don't want it too small or you will not have a tall enough mount to hold the needles.

4. Place the fiber fill in between the top part of the flat circle lid and the wrong side of the fabric. Have the fabric facing wrong side up, then the fill with the bottom side up lid on top (like a sandwich, a very dry and tough sandwich).

 5. (This is the tricky part, but not too difficult) Start to hot glue one notch while holding the cotton fill sandwich steady. Glue one notch at a time, starting with one then the opposite notch to help keep the fill in.

 *IMPORTANT*
Hot glue is well…HOT! Please be careful.

Pull snug but not too tight. Remember to have a tall enough mount on the top.
Continue to glue down the rest of the notches.

 6. After all it said that done, you can flip it right side up and add the ring and screw it back on the jar. Super easy.


 If you want more poof to the top, just make adjustment s to the fabric size and the amount fiber fill.

I added ribbon to the lid to dress it up a little.

Again, I hope this tutorial makes sense and easy to follow.

Saturday, October 29, 2011

Monster Cupcakes! RawR!


I made cupcakes for a Halloween party this year. I made cookies last year and wanted to do something different this year.


They are pretty simple. I just used a grass tip for the green fuzzballs. I decorate cakes for a living so I've got all the equipment. :)


I'm happy with how my Frankenstein's monsters turned out. I couldn't help but make at lest one bride of Frankenstein.  I LOVE the noses!


These blue buddies are made with a star tip. But watch out, they will bite your fingers off!


Now these Draculas sport a nifty widow's peek. Unfortunately, I forgot to take a picture of the blood drips that I added to their fangs.


And last but not least. MUMMIES! The wrappings are made with the flat side of a ribbon tip. These three amigos are thick as thieves.

Now I think next year I will step up and make an awesome spooky tiered cake.  I have an idea in mind...


Wednesday, October 26, 2011

Velcra - Quick and Dirty


I saw this video a long time ago, and I fell in love with it.
Velcra is a Finnish industrial metal/electronica group.

Anyway, I love the part when she holds up the signs that say quick bomb and dirty bomb.

They were super easy, took no time at all. I think I want to make them into pillows.


As you can see I haven't do anything with them yet. I just finished them the other day.


Sadly no one will get the reference. They are not even on iTunes. :(

I love how inspiration can come out of nowhere.


Odds and Ends


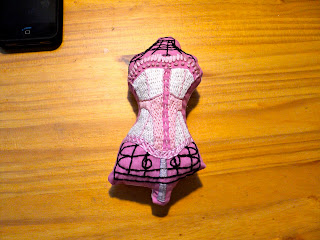
I finally made my corset embroidery into a pin chusion.

Here is that only mouse that I will EVER let in my kitchen.
He looks so happy on his little tower of tea cups.


I've been doing a lot of satin stitching lately and I was a little burned out, or rather my poor little hand!


But I couldn't resist! This really didn't take me that long to do.
I love how colorful it is.

Wednesday, October 19, 2011

My husband the artist

My hubby posted on his blog finally! I have to give him a hard time (he doesn't post very much)
I've done a couple embroidery piece that featured on of his girls.

Like this one and this one too.

He has great potential. I can see him completing some of his bigger projects and putting them on our Etsy shop. I think that they would sell. I have faith in him, he would do so well. He, like I have a hard time convincing ourselves that our crafts and art are good enough that other people would enjoy it too.


Monday, October 17, 2011

Halloween kitchen collection

This is my normal everyday kitchen decor.

I just happen to LOVE spooky stuff and well it's just to cool to display once a year.

Just some cool crap that I love. :)

Thursday, September 22, 2011

Over at the Glitter and Gloom Blog...


Currently taking inventory of all of our items, sifting through the plushie goodness!


Life got in the way of our shop's relaunch, but now I have time to focus on the shop and I'm in full swing of getting our items back up.

And if you look closely you'll see some new stuff too!

Coat Hanger Cover

After years of thinking that coat hangers covers were silly. I saw somewhere a very pretty embroidered cover. And well, lets just say that I'm singing a different tune now.
I have wanted to use this Sublime Stitching design for some time now and thought that it would be prefect for this project!


The coat hanger cover it all it's glory
I've become enslaved in the need to fill in all the empty spaces. 
I actually enjoy satin stitches, they aren't hard and they look pretty. They just take a lot of floss.


Even though you really can't see the hair, I was proud of myself, it was the first time that I really tried a satin stitch.

Monday, September 19, 2011

Kitchen wall

I finally got my embroidery up on my new kitchen wall.

But as you can see I have plenty of space to fill :)

Wednesday, September 14, 2011

Friday, September 9, 2011

Shoes!

 I LOVE Iron Fist shoes but not the prices.
I had an ugly plain white ballet flats leftover from a wedding I was in and well, I hate flats. Plus these were BORING white. I was going to toss them but I ran across a tute on the CO&K site. Then I knew what I would do with them.
 I found the shoes that I liked the best and used that for reference.

 So pretty!

  
The teeth!

I'm not a painter in any way, just not my forte. But I bit the bullet and just did it. 

 It's a good thing that I have shaky hands.
 WIP pics.

DONE!
 They turned out just GREAT!! I was so impressed with myself for never have done anything like that before. I think that I'll buy some black flats instead of painting the whole shoe black. It was a lot easier then I thought.
My hubby likes them so much that he wants me to display them instead of wear them. lol!

Tuesday, August 30, 2011

This just in: "Massive move halts all crafts!"


Sorry for the long pause here. I moved. As in "I have a lot of junk (a whole house worth) and had to move it all" move. :)

I love our new place. It's only a couple of years old and has so many modern features that our old house didn't. For example: A hell of a lot more windows. And some naked windows. I kinda have this thing about bare windows at night. I DO NOT want people to see in my house at night.

There are shades on the large windows just not on the front door ones. I've caught myself running past them at night. I'm such a wimp.

So I've started making curtains for the front door.


Nice and open. The side one you can see down the stairs into the craft room, not cool.
The top one you can see all the way into the kitchen which is in the very back of the house. Eep!

I made curtains for the side one that I put up with some adhesive Velcro. I didn't want to put holes in anything.
They turned out pretty good. I didn't want to block the great lighting we get from them so they are just sheer, but do the job at night.


I have made the top portion, but I don't have a solid way to set them up yet. The little pieces of Velcro worked for the small area on the side window but the top is a lot longer.
I also made those out of the sheer fabric.
And again I don't want to put holes in the wall. I've been thinking about something with a doll rod and Velcro. That should light enough to not weight it down too much.


Thursday, July 14, 2011

DYN-O-MITE!

These guy know how to go out with a bang!

They are just busting with devious intent.


Weather its just one of them or the whole group, they are exploding with cuteness!
Even though they are made of felt and stuffed with fluff, I wouldn't put it past them to try something. ;)

Cross posted on Glitter and Gloom blog