Friday, August 31, 2012

It's just a Jump to the Left, and a Step to a Tee Shirt Recon

I have had a love affair with Rocky Horror Picture Show ever since I was 15.
That's a mighty long time.
I have even been to a midnight showing.
My hubby (who doesn't like the movie) bought my the 25th anniversary edition shortly after we were married. That's how much he loves me. :)


I bought this tee shirt 17 years ago (I'm kinda showing my age here), but I've had this shirt for a very long time and it is near and dear to my heart.
I will be honest and say that I rarely wore it, with it being a men's XXL. But it was just too cool to not possess!
 I was digging around in my chest of drawers when I spied it on the very bottom, all rumpled and forgotten. In an instant I knew what I what going to do with it.


For awhile I have been coveting a Kreepsville666 tunic dress.


SO I decided that this is what I wanted to do with it.

 The graphics are large and had to be cut off, but I kinda like it that way, it's very much so not cookie cutter.


It was very easy, and took no time at all. I just used a tight fitting shirt as a template and went to town.


Wednesday, August 29, 2012

Inspirational Junk, er, Stuff!

I tried to have a sort of utilitarian home decor, but I was only fooling myself. I have to be surrounded by little chucks of plastic and vinyl to perk me up.

I like stuff.


I love girly things. I really do.

 I still have a lot of my childhood toys (that survived), those I keep in large plastic tubs in storage (my parent's basement).

Everything that I have on display means something to me, I don't just buy toys and trinkets on a whim. Ok, I shouldn't say on a whim, but you know what I mean. :)

 My shelves, tabletops and chest of drawers have photos, painting, books and toys.

 All the boxes, bags and cases serve a purpose for storage, and they really do come in handy.

 I even have a little "window seat" but my pillows obviously need it more then I do.

My inspirational board is cram full of well, inspirational stuff!
I like little bits of color.

Thursday, August 23, 2012

There is no fabric, only cake

This is a different post today. I wanted to break it up a little bit and show a little of what I actually do for a living.

I've been a cake decorator for about 12 years now. Wow, I suddenly feel old.

But less babble and more photos! Enjoy!


 My "traditional" cake


 The ever popular neon and zebra print. The "dreaded zebra" I like to call it. It is VERY popular, perhaps a little too popular, ugh.


 mug o' beer cupcake cake


 My favorite


 You can't tell by the photo but this is a rather small 5 inch smash cake.


 I think simple is more elegant.


 This one is actually a commission from out of my house. I was a nervous wreck when I had to deliver this one.


All of these are made out of buttercream or whipped cream.

Tuesday, August 14, 2012

Yoyos, yo?

I've always seen these little things here and there, I never knew what they were called. A while ago my sister mentioned that we should make some. I said sure, but that were quickly forgotten. 
But then I saw them on the Internet and that re-sparked my interest. 

I can't believe how easy they are to make.
They take very little fabric and thread to make. I put a little tutorial together to show how easy they are.

You will need: 
5 x 5 inch pieces of fabric
needle 
thread
pencil
a circle template (I used a Spiderman tin)
scissors


I started out with a 4 inch diameter circle. (I just used a tin lid, because it was the perfect size and convenient)

 
 Trace the circle onto the fabric using a pencil or what ever you prefer to use.

 Then cut out the circle, like sew, ha ha, get it? sew, so, um yeah...

  
I use a lot of scraps I had saved, worked out very well.

Next, fold under about a quarter of the fabric and then take your needle and thread and tie off the end, large enough that it won't slip right through the fabric and start a running stitch around that quarter inch fold. Kinda like a hem.

 
 Try to make sure that the stitches are small and even.

 End you last stitch right next the first stitch, but don't tie it off, you then firmly grip the thread and GENTLY pull on it.

Then it will start to gather. 

 It will now have soft pleats as you gather the edge. Sew a stitch or two to hold the gathers in place, then knot (a couple of times to make sure it stays) and cut off the end of the thread.


 This should be what they look like when you are finished.
A little under three inches.
You can adjust the size of you circle if you want larger or smaller yoyos.

 I ended up make few, after I got the hang of it, it went pretty fast.


Now I have to think of what I want to put these on. My sister said she wanted to make a quilt out of them. That's A LOT of yoyos! But it would look adorable.

I'm thinking more along the lines of a necklace or a headband. Much easier.


Tuesday, August 7, 2012

Mister Simon

Previously I made a post about the baby gifts that I made for a friend. This post is pretty much the same thing but for another friend.
I came to the conclusion that I really enjoy making baby stuff. Everything is miniature, it's so freaking cute!
Alright, move along I'm done squealing.
 
Mister Simon was introduced to the world back at the end of May.

I made a box bag, bunting, appliqued a tote, embroidered a onesie and a couple of burp clothes.
 
She had a couple of themes and I completely ignored them ;)

She loved everything!

 This is the second box bag that I have ever made and it turned out better then the first one.
Practice makes prefect, right?

 
I posted a tutorial on how to make these here.

I drew up this little guy in a snap and appliqued him onto a canvas bag. 

I draw better in straight lines.

I just had to embroider a onesie.

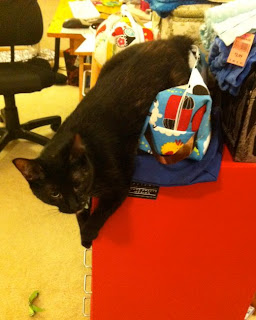
And Cinnamon just had to "help" by laying on the stuff.

Friday, August 3, 2012

Fishy Cat Toy

I have LOADS of felt pieces just sitting in a drawer waiting to be used.  I just had no clue on what. 
Then the idea to make cat toys popped in my head.

This project was very easy, and very quick.

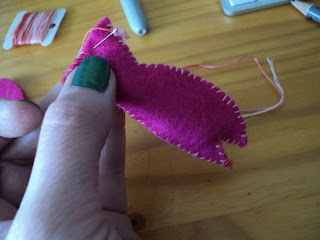
I drew out some shapes and cut them out.
Then I filled them with a piece of very crinkly plastic. My cat LOVES noise toys.

Then I hand stitched it. Nothing special, Cinnamon doesn't appreciate my fine work.

I used just what ever scraps that I had just hanging out.

All done!
Pretty simple. 

Needless to say, Cinnamon LOVES the fishy toy. She liked to play fetch with it. Every time she's in the other room and I crinkle it, she comes a runnin'!